Hi everyone!!!!

Here I am again!!! This time I bring you a collaborative work made by Ana, Cintia, and me. It is a double-step project. First, we have created a storyboard (step 1) for creating an educational videoclip (step 2). As you could guess (taking into consideration the tittle of this post...) in this blog's entry I am going to write about the first step: our Storyboard.
We did it using the tool StoryboardThat. As always, the first thing you have to do is to register using your e-mail; Google or Microsoft account; your social networks (Twitter or Facebook); or using the link provided by your teacher (if this is your case).
Once you have done that, you can start creating storyboards! For so, you have a lot of features:
- Scenes: This is the place for choosing your background image. You have different options: town, entertainment, home (indoor and outdoor), school, athletics, transportation, work, classical homes, historical, US history, country & rustic, outdoor, mythical & futuristics, closeup, and patterns. In each of them you have a lot of different pictures for your background, but...if you do not find what you need, you can also go to "uploads" and there you will be able to upload your own images for using them as background.
- Characters: There you can select the characters you need. You can also different options: adults, teens, kids, jobs, sports, cultural, 1900's, 1600's to 1800's, medieval, classical era, monsters & myths, mythology, silhouettes, stickies, and animals. When you have chosen your character, you have to click in it and drag it (as well as the backgrounds) to the cell. Once there you can select the colour of the skin, hair and eyes; as well as the clothes. You can also edit the position and pose of your character.
- Textables: or the places where you can write whatever you want. You have different, such as: speech, action, shapes, decorative, banners, objects and signs. In each of the collections, you have a lot of them!!!
- Shapes: you can find shapes, 3D shapes, symbols, arrows, numbers, and hands. We just used one shape to split into two parts one of the scenes. But depending on what you are creating, it is useful.
- Infographics: in this part you will see icons, charts, banners and hands. We have used some icons for our storyboard adding them to white computer screens, as a case in point.
- Web & wireframes: as in the others you have different options: icons, wireframes, hands & gestures, and emojis. We have also included some icons of this option.
- Science: if you are creating a storyboard or comic in a scientific context you can find here interesting things divided in the following collections: anatomy, equipment, astronomy & space, and symbols.
- Worksheets: this is the last one you will find (before uploads) and it has: worksheet assets, graphic organizers, headers, elementary, science, maths, and templates.
With all this options they could have not include the "uploads" option, but they did!!! And that is something I have really appreciated, because we wanted to use real backgrounds, so... Thanks!
The process has been very easy; at the beginning, it was a little time-consuming, but when you get accustomed to the tool and where is everything you need, as well as (Here it goes a TIP) when you discover you can copy and paste the characters, and just change its pose... it is very easy and fast to create the storyboard.

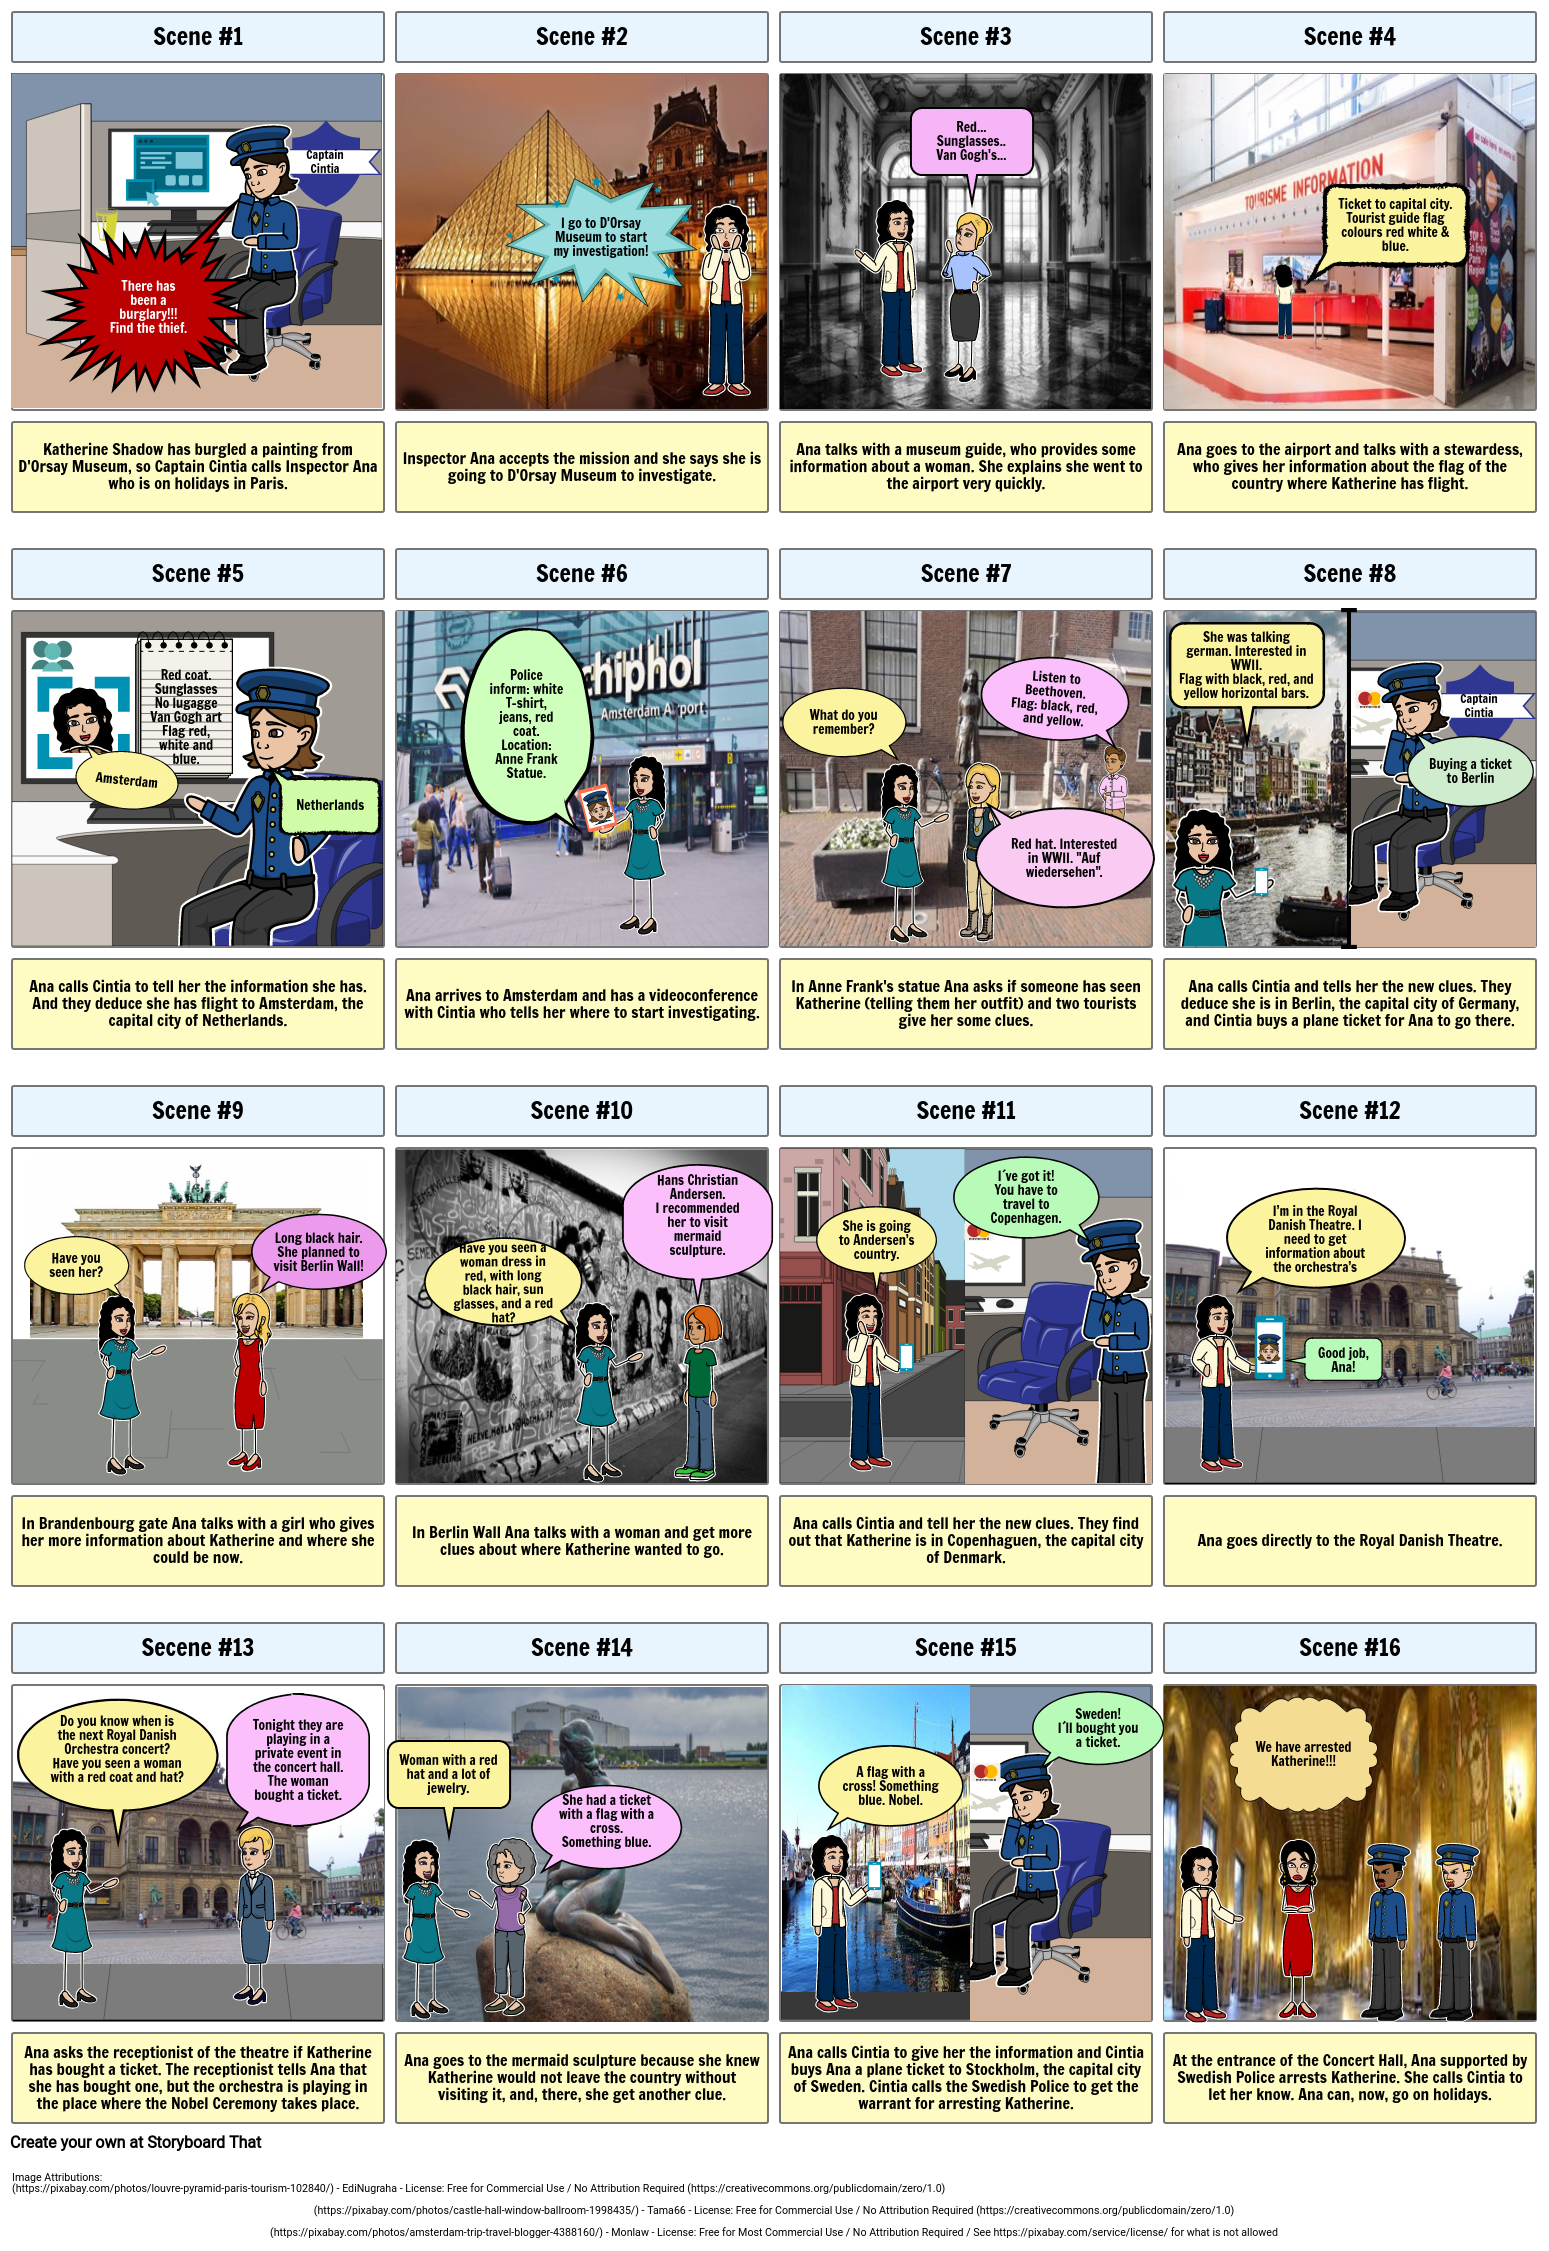
Now that you know the tool, I am going to explain our little project. We wanted to create a storyboard for our videoclip. It would be about geography (Social Sciences). We wanted to create something engaging for our students to introduce them some European countries, as well as their capital cities, and some of their main monuments and/or characteristics (such as their flags). That is why we wanted to use real background, and we are thankful StoryboardThat for allowing uploads. Our aim, as you can imagine, is to present different European countries in a different way, and our outcome could be use as introduction to the topic.
With no more delay, I am going to show it to you....
As the "embed HTML" storyboardthat provided me did not work, I have mixed it with some HTML I have used in other entries. I know the result is not the proper one, but I can assure you I did my best. Just in case, I leave you the link where you can see the storyboard properly.
I hope you like it and find this post useful!!!!!!

Comentarios
Publicar un comentario